This page contains a downloadable text file which can be imported into the Flex Check-In Host as a starting point for a Restaurant. Once imported
you can change the configuraiton as needed to suit your needs. Using this page's text file gives you a jump start on your Flex Check-In Host configuration.
Download Configuration File Here
Things to change in the Flex Check-In Host
- First, click on the Configuration Maintenance button on the main menu
-
Next, click on the Appearance tab and in this area, you can configure the Flex Check-in app to use your establishment's themed colors and images.
-
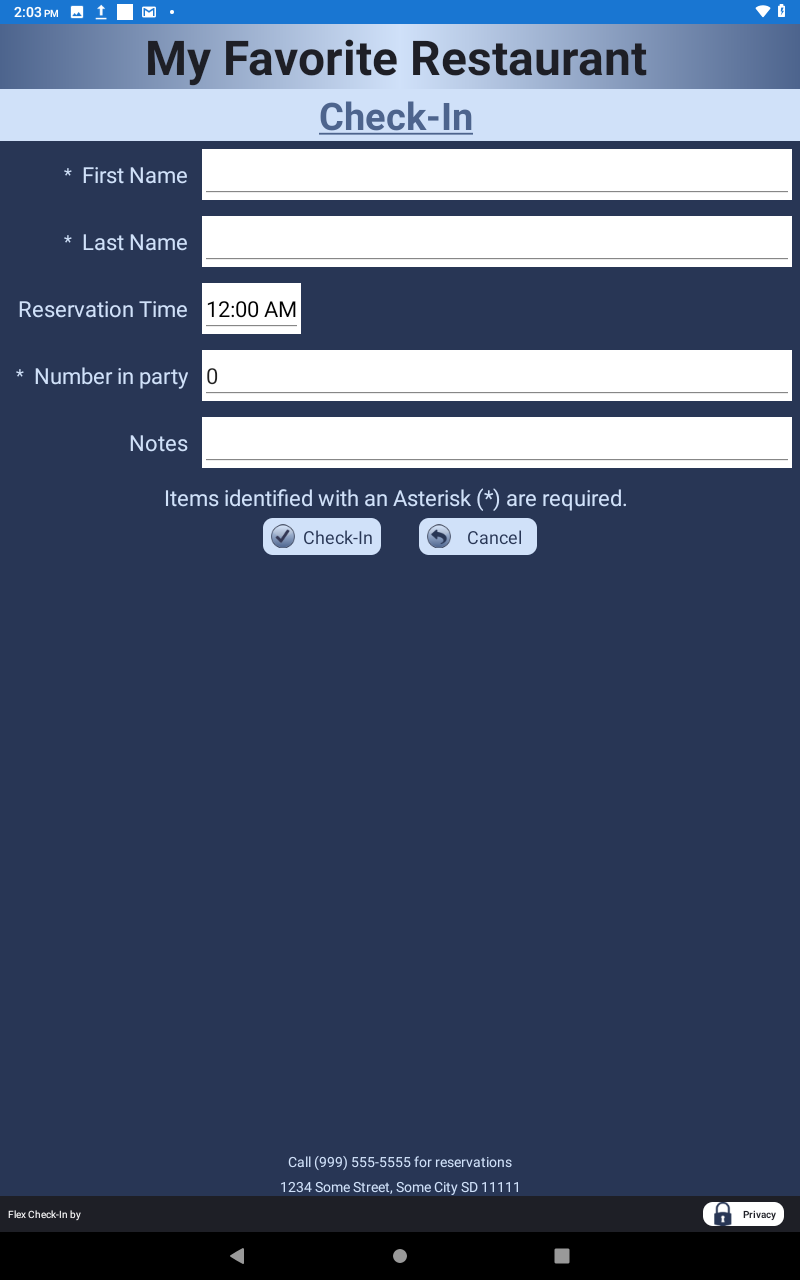
Within the Appearance tab, click on the Public Header tab. Here you will set the appearance of the check-in forms header and body. For header images,
maximum size recommended is 1200 pixels wide by 300 pixels high. An image with a 1:4 height to width ration (roughtly 485 pixels wide by 679 pixels high)
should work fine but you should preview
the check-in form using the Sample button at the bottom of the screen before you attempt to use it in the Kiosk app. If you wish to use a
background image behind the actual form fiels, it is suggested the image be 7:5 height to width ration
You can also simply enter one or more lines of text in the header instead of an image. It is recommended that no more than three lines of text be use.
-
Also, within the All-Footers tab. Here you control the messaging which appears in the footer of ALL Flex Check-In pages as well as
a specific message that will appear in the footer of the Check-In page.
-
Next, click on the Data tab found in the top most set of tabs. In this area, you can add, remove or re-arrange the order of fields that will appear on the check-in form.
In this area, if you would like to use a predefined list for the 'Reason for visit' field versus having it be free form text, you will need to DELETE
the existing 'Reason for visit' field and then add a new list field with your desired options specified. Also, if you use a list field, you can also implement
a Filtered WaitList by the value selected from the list.
-
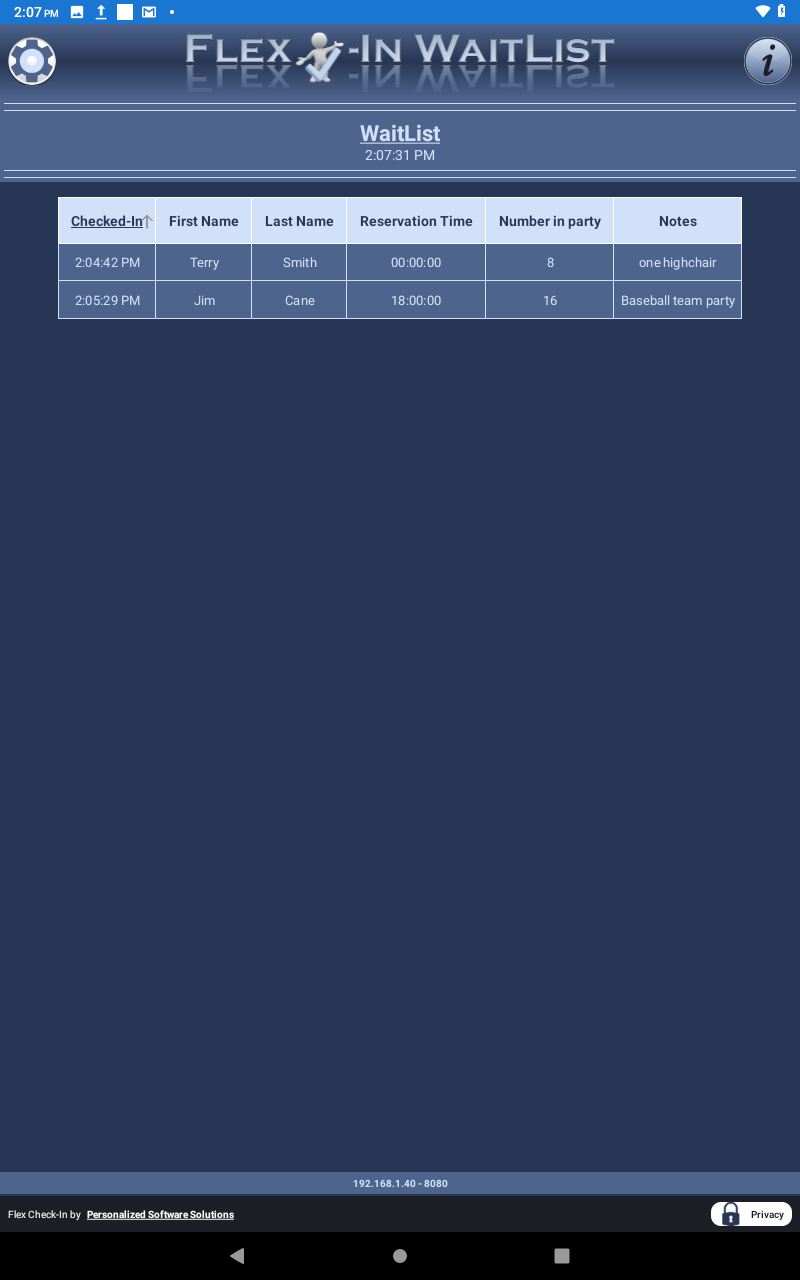
Next, click on the Waiting List tab found in the top most set of tabs. On the Fields sub-tab in this area, you can add or remove fields from the Public, Private and Filtered Waiting Lists.
-
Next, click on the Options sub-tab under Waiting List in order to turn on the Auto Expire or Save User Data options of the Flex Check-In Suite of applications. The auto expire feature
allows the check-in form to automatically reset after a certain period of time. This is helpful in the event a user abandons their check-in session and you don't
want their information simple left on the form for the next person to see. By defaults, the Flex Check-In Host application is configured NOT save any check-in information
to the device running the Host application. What this means is that if the Host application or the computer running it should be shut down,
ALL check-in information will be lost. The application is configured this way for security reasons. If you wish to keep check-in information
available in the Host application, even if the application should be shut down for some reason, you should turn on the 'Enable saving user data' option.
-
Finally, click on the Filter sub-tab under Waiting List. Here, if you added a List field to the form, you can activate the Filtered Waiting list feature.
On this tab you can also enable Check-In Notes that will appear within the check-in in the Wait List app when it is configured in Filtered mode.
Below as some screen shots that show you how the XML configuration file on this page will configure your check-in form as well as public, private and filtered WaitLists.
Check-In Form
|
Private WaitList
(Landscape view)
|
|
|
Public WaitList
|
|